Create Azure Cloud Account
Create an Azure Cloud Account for your Organisation.
To manage your Kubernetes clusters and integrate them with Azure services, you need to configure Azure credentials within our Console. Follow the steps below to set up your Azure IAM user with the necessary permissions.
Step 1: Create an Azure application registration
- Log into the Azure portal.
- Navigate to the App registrations page.
- Click button
+ New registrationin the tab bar at the top of the page. - Enter a descriptive name for the application. For this guide it will be
Azure demo application. - Select for
Supported account typesthe optionAccounts in this organizational directory only (Default Directory only - Single tenant). - Click
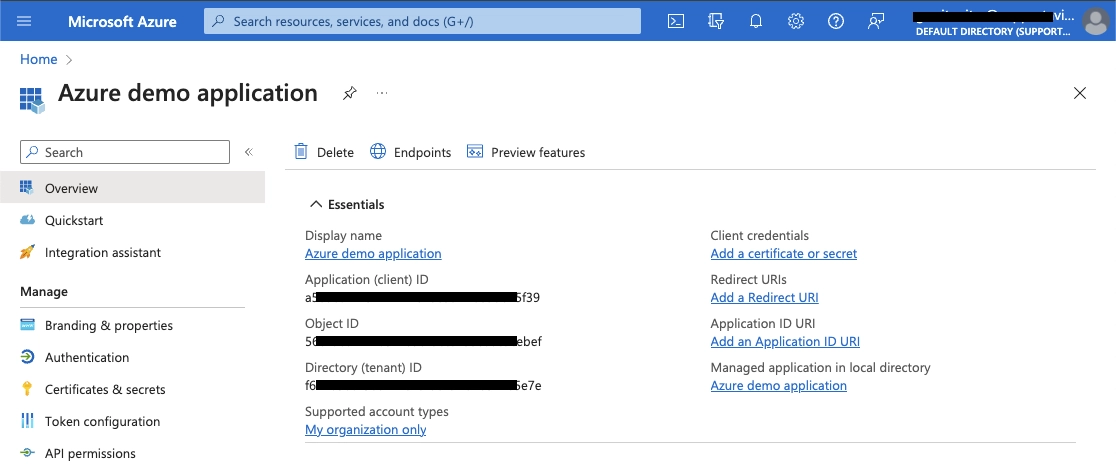
Registerto add the Azure application. - Copy the
Application (client) IDand theDirectory (tenant) IDfrom the detail page that you are redirected to after registring the Azure application. Save these for sectionCreate Azure Cloud Account in the Consoleof this guide.
Step 2: Add client secret to the Azure application registration
- Select the button
Add a certificate or secretfrom the Azure application detail page that was created in step 1 of this guide.
- Click the button
+ New client secret. - Fill out a meaningful description and select when you want the secret to expire.
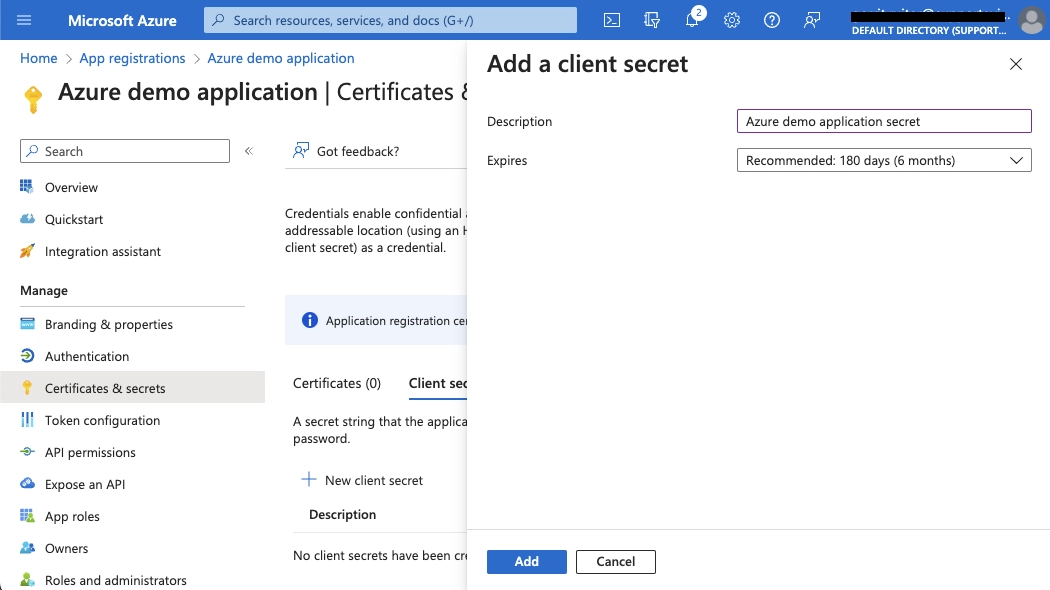
- Select the
Addbutton to create the client secrets. - Copy the secret value for section
Create Azure Cloud Account in the Consoleof this guide.
Step 3: Add Azure access control to the Azure application
- Navigate to the Azure Subscriptions page.
- Select the Azure subscription that you want to manage with AME.
- Copy the value
Subscription IDfrom the detail page and save for sectionCreate Azure Cloud Account in the Consoleof this guide. - Select
Access control (IAM)from the menu bar on the left. - Click button
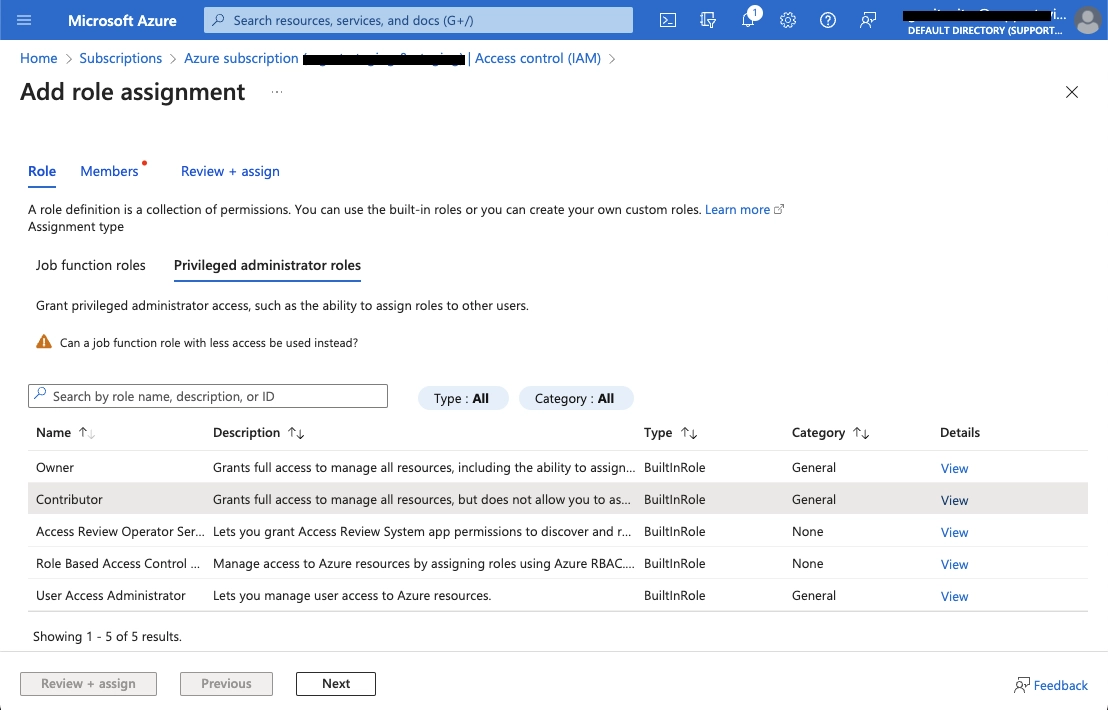
+ Addin the tab bar at the top of the page and selectAdd role assignmentfrom the drop-down that appears. You are now in theRolestep ofAdd role assignment. - Now select tab
Privileged administrator rolesand select roleContributor.
The
Contributorrole is aPrivileged administrator roleand is therefore not best suited. We will specify the minimum required roles in a future version of this guide.
- Click the
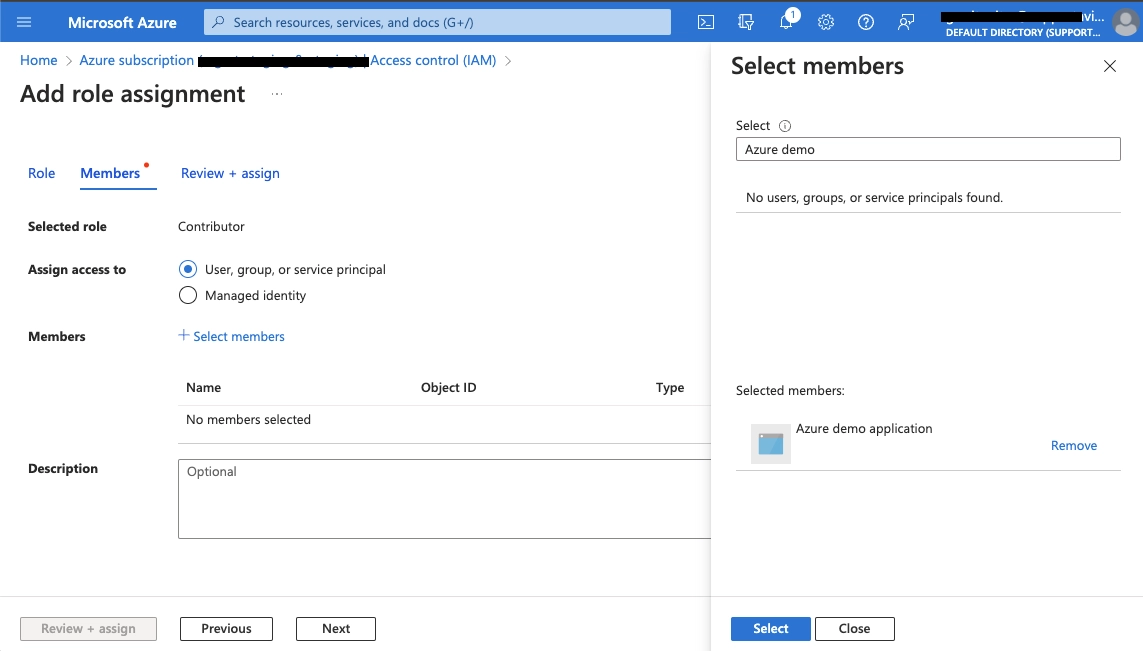
nextbutton to go to theMembersstep ofAdd role assignment.
- Click the button
+ Select members. - Type the name of the created Azure application registration from step 1. In the case of this guide:
Azure demo application. - Select the member from the search results that matches the search query and click the
Selectbutton.
- Click button
Review + assign. - Review and click button
Review + assign.
Create Azure Cloud Account in the Console
Now we can create a cloud account within the Console. In the side bar in the Console, select Cloud Account. Next click the button Add cloud account.
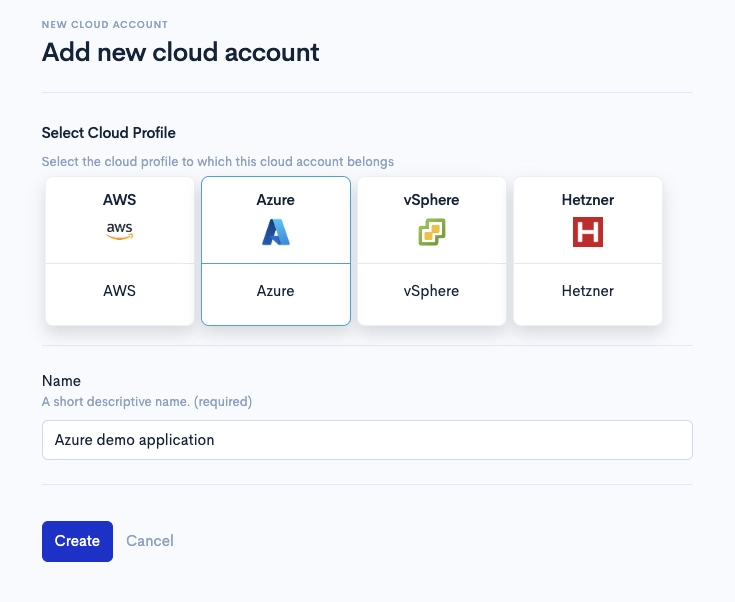
Fill in the name of your account. This is a short descriptive name used to identify the account later on, during cluster creation. You can create multiple cloud accounts for the same Cloud Provider.
Once this is created you are presented with a form to add Azure credentials to this cloud account.
Create Azure Cloud Credentials in Console
Fill out the Azure credentials that you copied earlier in this guide to the Avisi Cloud Console:
- Input
Directory (tenant) IDin form fieldTenant ID. - Input
Subscription IDin form fieldSubscription ID. - Input
Application (client) IDin form fieldClient ID. - Enter the Azure appliation secret in form field
Client secret. - Click the button
Create Azure credentials.
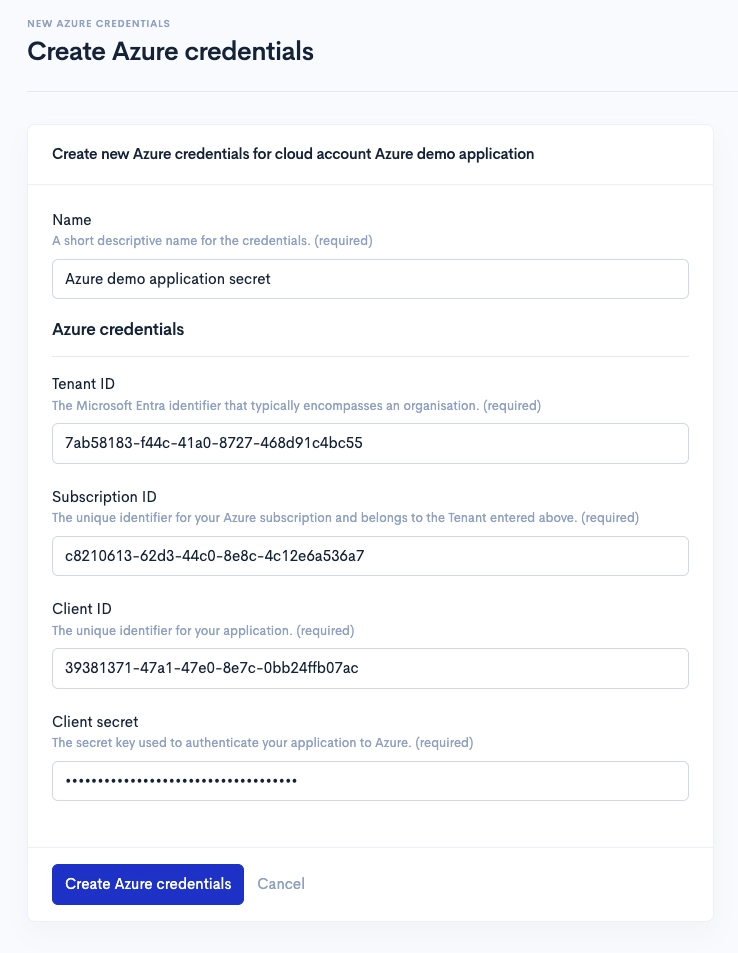
The credentials will be validated when you create them and will only be saved if the validation succeeds. After saving the Azure credentials, you can use this cloud account in the Console when you create a new cluster.
Required steps before creating an Azure cluster
Azure requires a few additional steps before you can create a Cluster:
- Ensure Azure quota’s (like CPU) are correct for the requested virtual machine sizes.
- Ensure the requested virtual machine size is available in the region you provision your Cluster in.
- Enable Azure feature
EncryptionAtHost:az feature register --namespace Microsoft.Compute --name EncryptionAtHost. (required for instance types with resource disks).