Create AWS Cloud Account
Create an AWS Cloud Account for your Organisation.
To manage your Kubernetes clusters and integrate them with AWS services, you need to configure AWS credentials within our Console. Follow the steps below to set up your AWS IAM user with the necessary permissions.
Step 1: Navigate to AWS IAM
- Open a web browser and go to the AWS IAM console by clicking here.
- If prompted, sign in with your AWS account credentials.
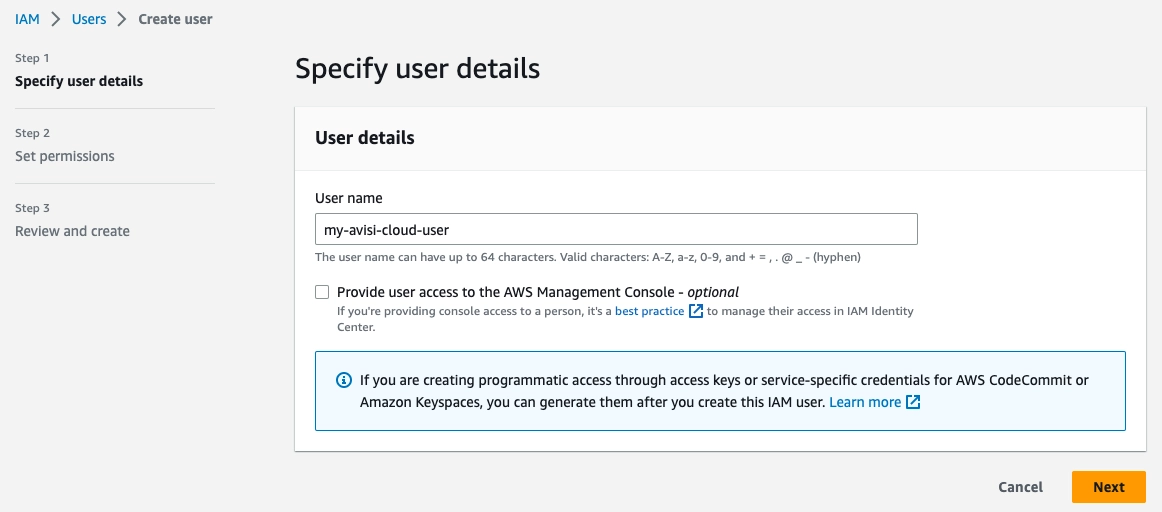
Step 2: Create a New IAM User
- In the IAM console, click on “Users” in the navigation pane.
- Click the “Add user” button to create a new IAM user.
- Enter a name for the user in the “User name” field, such as “my-avisi-cloud-user”.
- Click the “Next: Permissions” button.
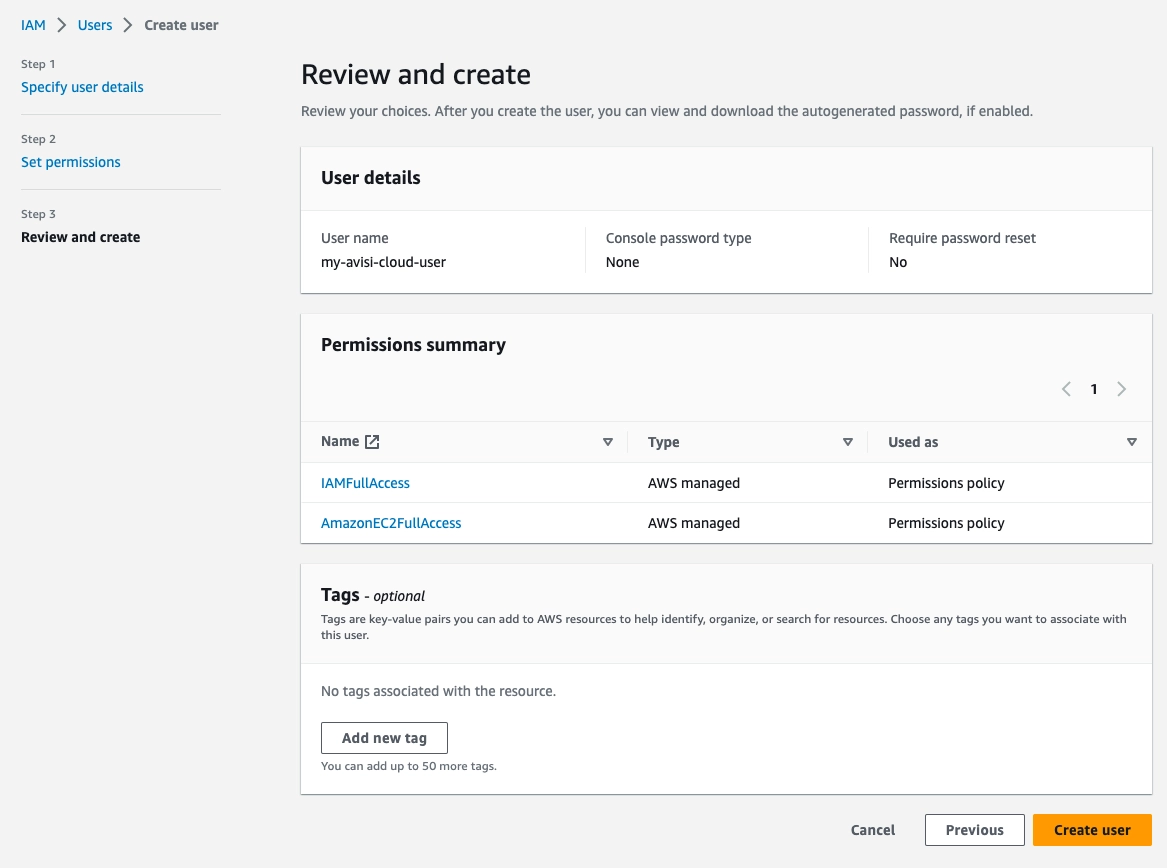
Step 3: Add Required Policies
To enable the necessary AWS permissions for managing Kubernetes, we need to attach two policies to the IAM user: EC2FullAccess and IAMFullAccess. These policies provide the required permissions to provision EC2 resources and manage IAM policies for Kubernetes integrations.
- In the “Set permissions” step, click on the “Attach existing policies directly” button.
- Search for “EC2FullAccess” in the policy search box and select it from the list.
- Search for “IAMFullAccess” and select it as well.
- Double-check the selected policies to ensure they match the following:
EC2FullAccessIAMFullAccess
- Click the “Next: Tags” button (you may add tags if needed, but they are not required).
- Click the “Next: Review” button.
IAM Permissions
EC2FullAccess is required in order to provision AWS EC2 resources, such as:
- VPC
- Subnets
- EC2 Instances
- Loadbalancers
- NAT Gateways
IAMFullAccess is required for:
- Provisioning IAM Policies, attached to EC2 Instances
- Creating new IAM user for Kubernetes integrations, such as Load Balancer Controllers, Storage integrations (CSI / Container Storage) and cloud-controller-manager (https://kubernetes.io/docs/concepts/architecture/cloud-controller/).
Step 4: Review and Create the IAM User
- Review the information provided for the IAM user to ensure it is correct.
- If everything looks good, click the “Create user” button.
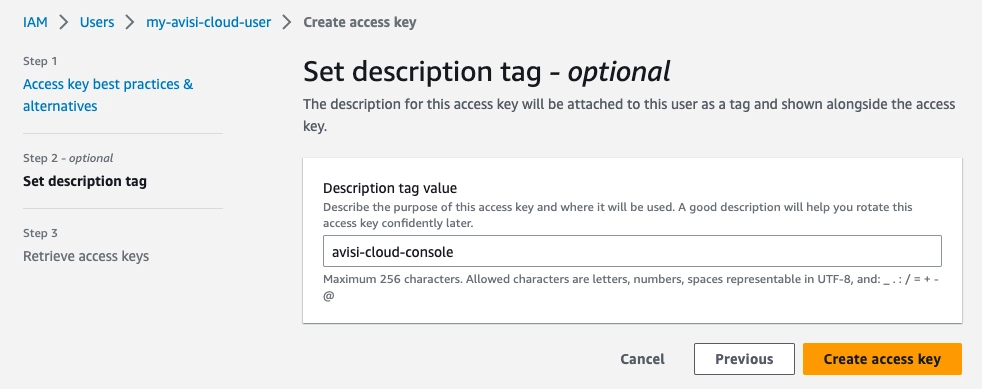
Step 5: Retrieve AWS Access Key and Secret Key
Create IAM Access Keys
Navigate to the newly created IAM user, and under the security credentials tab select “Create Access key”.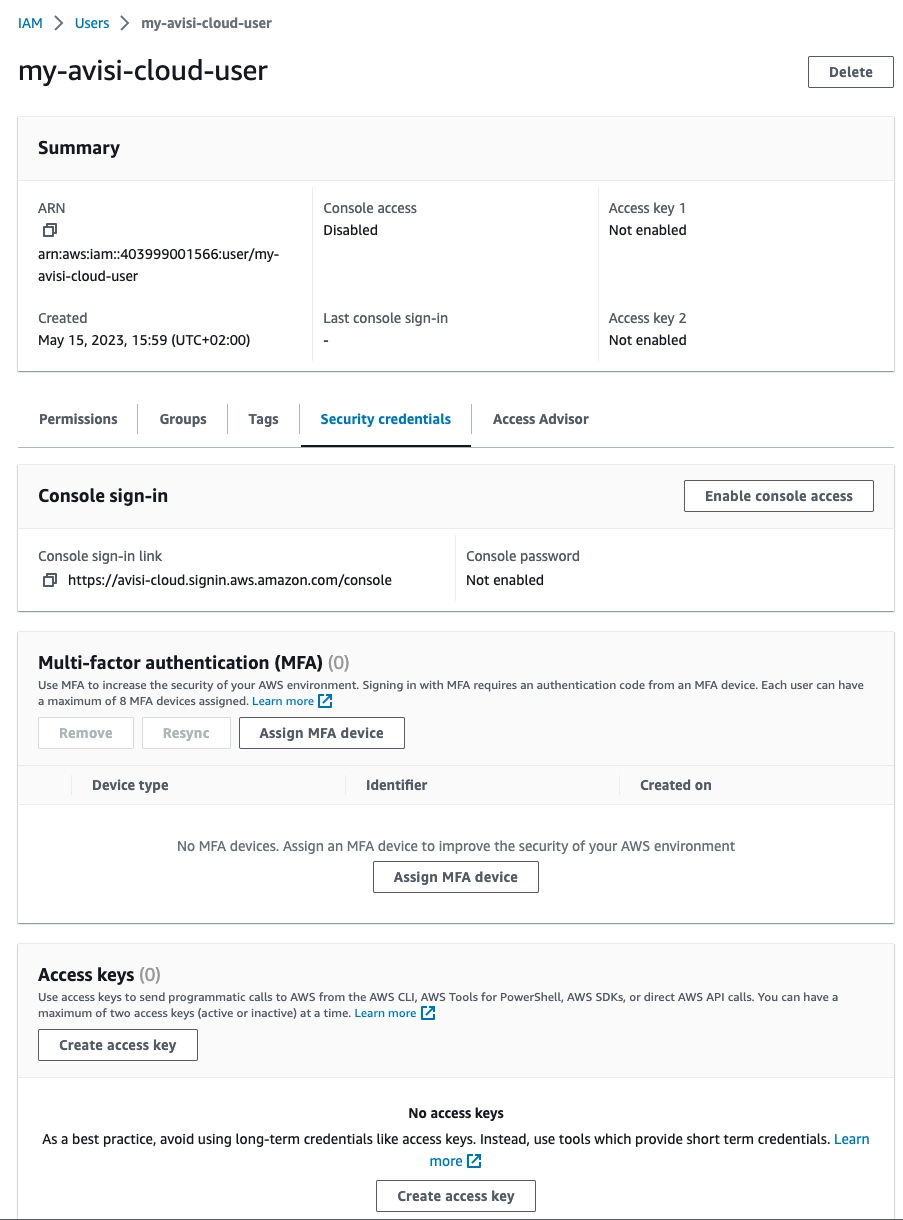
Create the new Access Key by selecting the “Other” type.
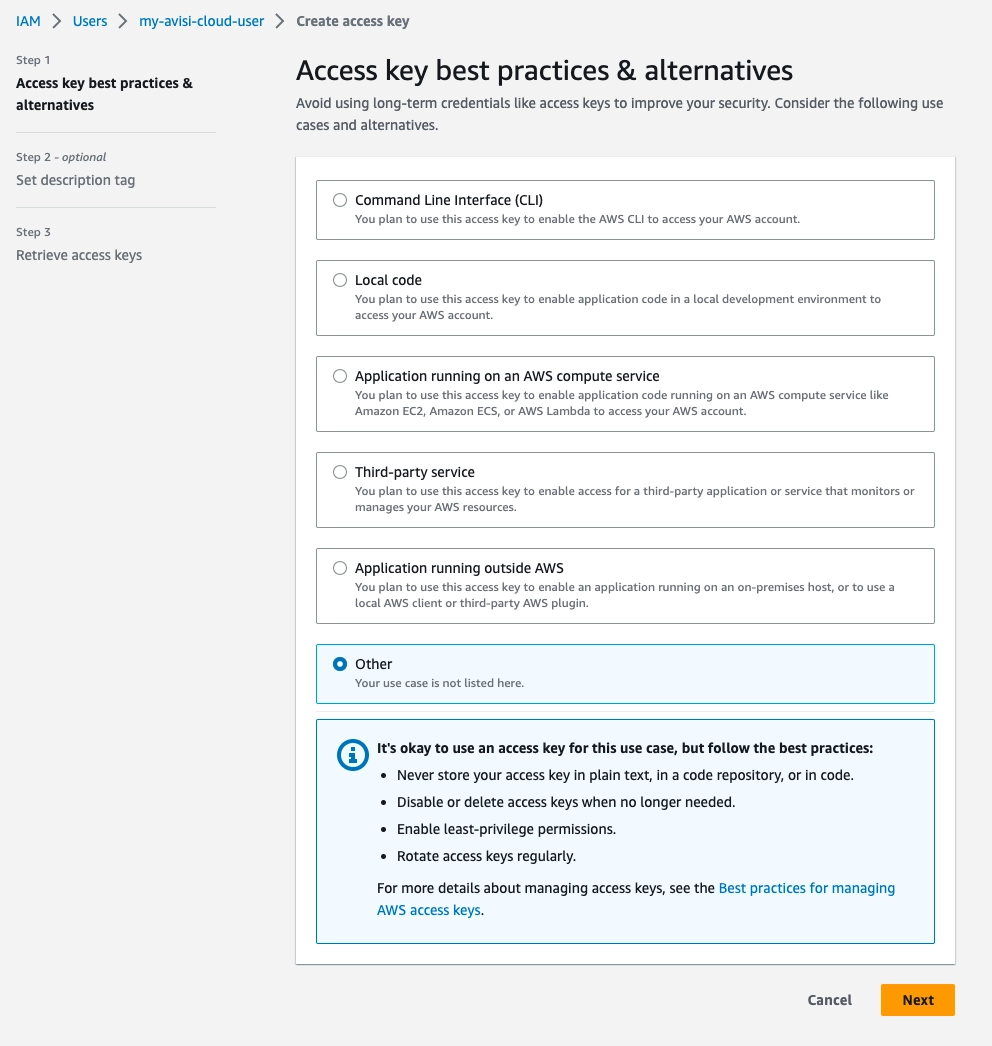
Press next, this will present you with a screen to enter a descriptive name for the new access key.
After this, you are presented with the Access Keys (Access Key in screenshot is for demo purposes):

Create Cloud Account in the Console
Now we can create a cloud account within the Console. In the side bar in the Console, select Cloud Account. Next select add Cloud Account.
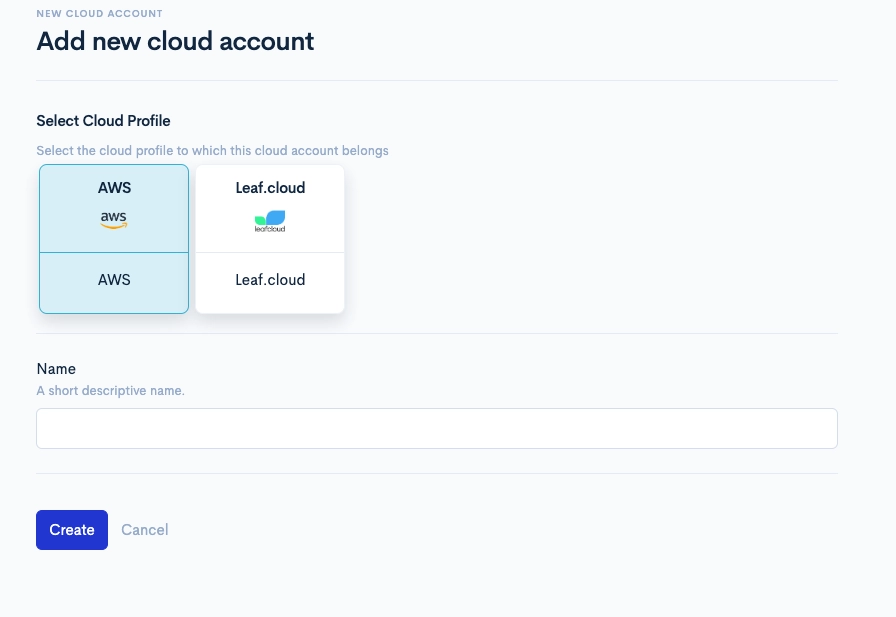
Fill in the name of your account. This is a short descriptive name used to identify the account later on, during cluster creation. You can create multiple cloud accounts for the same Cloud Provider.
Once this is created you are presented with a form to add AWS credentials to this cloud account.
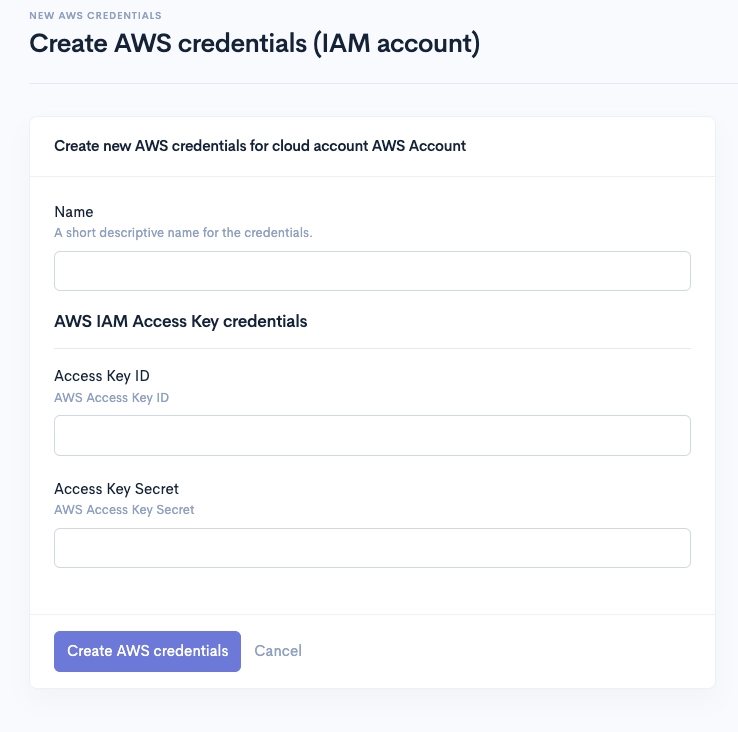
Copy Access Key Credentials
Copy the Access Key credentials to the Avisi Cloud Console.
- The
Access Keyneeds to be pasted into theAccess Key IDfield the Avisi Cloud Console - The
Secret Access Keyneeds to be pasted into theAccess Key Secretfield in the Avisi Cloud Console - Enter a descriptive name. We recommend the same name as you used for creating the access key in AWS.
After pressing create AWS Credentials, you can now use this AWS account within the Avisi Cloud Console.